
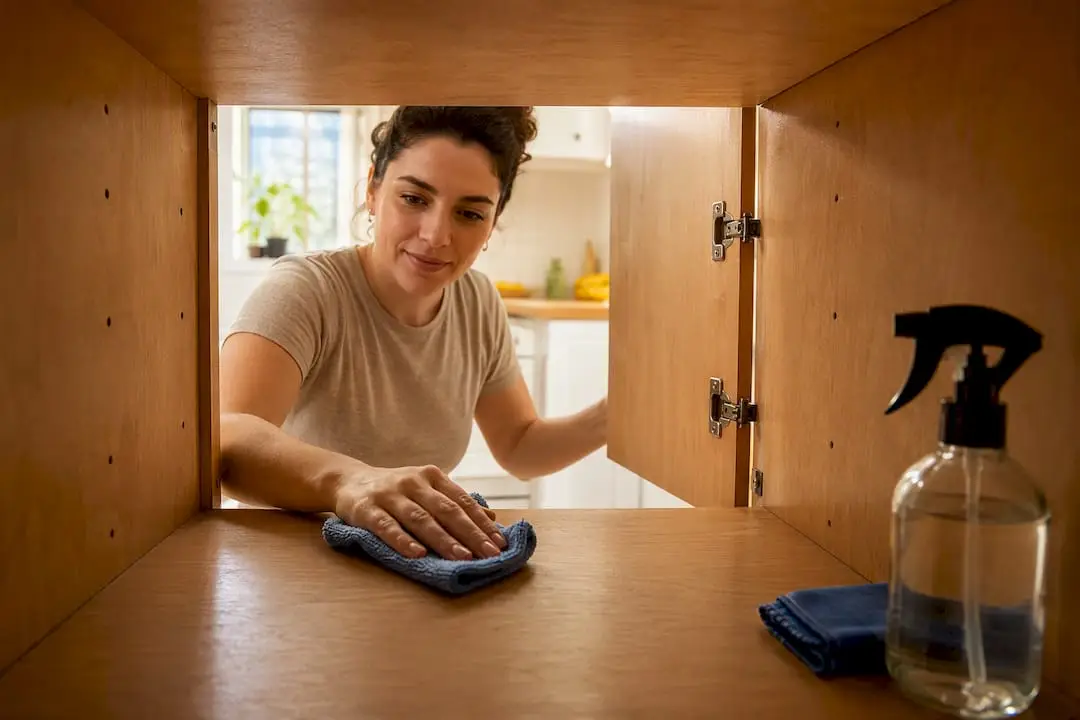
The simplest safe method is this: empty the cabinet, vacuum out crumbs and dust, wipe every surface with a cloth dampened in warm water and a few drops of mild dish soap, rinse with a second clean damp cloth, then dry immediately. That handles most cabinets effectively. Reach for a degreaser or baking-soda paste only on sticky, polymerized grime, and call a professional cleaning crew if the job is bigger than an afternoon.
TL;DR:
- Proper deep cleaning involves vacuuming crumbs before wiping with a damp cloth, followed by thorough drying and air circulation, especially for greasy areas.
- Heavy grease buildup requires a baking soda paste or commercial degreaser, with testing first to avoid damaging painted or laminate surfaces.
- Use only mild soap, avoid disinfecting wipes, abrasive pads, and steam cleaners to prevent finish damage and warping over time.
- Regularly spot-wipe high-traffic shelves and empty cabinets every three to six months to maintain hygiene and prevent grime accumulation.
- Professional cleaning is recommended for years of grease buildup, move-out preparations, or when avoiding time-consuming DIY efforts.
Table of Contents
- What You Need for Inside Cabinets Cleaning
- How Do You Clean Inside Kitchen Cabinets Step by Step?
- How Do You Deep Clean Greasy Cabinet Interiors?
- Drying and Finish Care After Cleaning
- How Often Should You Clean Inside Your Cabinets?
- What Should You Never Use Inside Cabinets?
- What Do Professional Cleaners Do Differently?
- The Best Way to Clean Cabinet Hardware
- How Do You Get Rid of Mold Inside Cabinets?
- What Actually Matters More Than the Products You Use
- Book Professional Cabinet Cleaning With Pure Homes Cleaning
- Sources
- FAQ
What You Need for Inside Cabinets Cleaning
Before you touch a single shelf, gather what you need. Inside cabinets cleaning goes faster, and does less damage, when you’re not improvising halfway through with a paper towel and hope.
Tools:
- Microfiber cloths (at least two: one for washing, one for rinsing)
- A soft-bristle brush or old toothbrush for corners and hinges
- A handheld vacuum or vacuum attachment for crumbs and dust
- A nonabrasive sponge for stuck-on spots
Cleaners by finish:
- Mild dish soap mixed with warm water, the Wirecutter-recommended default for painted, laminate, and sealed wood surfaces
- A 50/50 water-and-vinegar mix for deodorizing unfinished or sealed wood, used sparingly and never on unsealed surfaces
- Baking soda paste for spot-treating stains without scratching
Heavy grease near the stove sometimes needs a dedicated degreaser, sold at any big-box home store. Keep one on hand, but don’t reach for it first.
How Do You Clean Inside Kitchen Cabinets Step by Step?
Work one cabinet at a time. Trying to empty three cabinets simultaneously turns your counter into a storage crisis and increases the odds something gets set down on a wet surface. Lay a towel on the counter first so emptied items have a clean, dry landing spot.
- Empty and sort. Pull everything out, wipe down items as you go, and toss anything expired or long forgotten.
- Remove debris. Vacuum the corners, drawer tracks, and shelf edges, or sweep crumbs out with a dry microfiber cloth. Doing this before you introduce any liquid matters. Skip it and you’ll turn loose crumbs into a gluey paste the moment a damp cloth touches them, according to step-by-step cleaning guides.
- Wash. Dampen a cloth with warm water and a few drops of dish soap, wring it out well, and wipe every interior surface, including the back wall and the underside of each shelf. That underside gets skipped constantly, and it’s where grease drips collect.
- Rinse. Wipe the same surfaces again with a cloth dampened in plain water to lift soap residue. Leftover soap film actually attracts dust and grime faster than a properly rinsed surface.
- Dry. Towel-dry immediately, then leave the doors open so the interior can air-dry fully. Never close a cabinet on a surface that still feels cool or damp to the touch.
- Reorganize. Check expiration dates one more time, wipe or replace shelf liners, and only put items back once the cabinet is completely dry inside.
Pro Tip: Do the top shelf first and work down. Drips and dust fall, so cleaning bottom-up just means redoing the bottom shelf twice.
How Do You Deep Clean Greasy Cabinet Interiors?
Regular dish soap handles daily grime. It won’t touch grease that’s baked on and turned into a sticky, yellowish film, which happens most often in cabinets near the stove or above a range hood. That’s polymerized grease, and it needs a different approach.
- Mix baking soda with a small amount of water into a thick paste, spread it on the grease, and let it sit 10 to 20 minutes before scrubbing gently with a soft brush, a method pro cleaning guides recommend for stubborn buildup.
- For grease that shrugs off baking soda, use a commercial degreaser made for kitchen surfaces, then rinse thoroughly with a soap-and-water wipe. Skipping the rinse leaves a residue that attracts new grime almost immediately.
- Always test any cleaner, degreaser included, on a hidden spot first. Good Housekeeping’s cleaning lab flags this step because painted and laminate finishes react differently than sealed wood.
- Painted and laminate surfaces tolerate baking soda paste well but can dull under harsh degreasers. Natural wood interiors need gentler treatment across the board, and glass cabinet inserts just need a standard glass cleaner, never an abrasive pad.
Drying and Finish Care After Cleaning
A damp cloth is fine. A soaked one isn’t. Excess water seeping into seams and corners is how wood swells, laminate edges peel, and painted finishes bubble over time. Wring your cloth until it’s barely moist before it touches any interior surface.
- Dry surfaces to the touch immediately after rinsing, then prop the doors open for at least an hour so trapped moisture has somewhere to go.
- On wood, wipe with the grain rather than against it. It shows fewer streaks and won’t push moisture into the grain lines.
- Skip steam cleaners entirely. The heat and moisture combination is one of the fastest ways to warp wood or loosen laminate.
- Buff finished wood with a dry microfiber cloth after it’s fully dry, no polish needed for routine cleaning.
Pro Tip: A small fan pointed at an open cabinet cuts drying time significantly, especially useful before humid summer days in the DC area.
How Often Should You Clean Inside Your Cabinets?
A regular wipe of cabinet faces and handles keeps grime from building where hands touch most. That’s maintenance, not deep cleaning, and it takes minutes.
Interior deep cleaning is a different rhythm. The Kitchn recommends emptying and washing the inside every few months, and Good Housekeeping’s experts put food-storage cabinets on at least a quarterly schedule for hygiene reasons as much as appearance.
- Cabinets flanking the stove or above it need more frequent attention due to grease buildup.
- Spills get wiped the moment they happen, not saved for the next scheduled clean.
- Between deep cleans, a five-minute spot-wipe of shelves that get the heaviest traffic (spice cabinets, the one under the sink) keeps things from sliding backward.
What Should You Never Use Inside Cabinets?
Disinfecting wipes seem convenient, but their chemical blend can dull or yellow painted and laminate finishes with repeated use, a warning several wood-cabinet care guides echo. Undiluted bleach carries the same risk and is far too harsh for interior surfaces.
- Skip disinfecting wipes and undiluted bleach. Use diluted mild soap instead.
- Skip abrasive scouring pads, which scratch finishes permanently. Use a soft brush or nonabrasive sponge instead.
- Skip steam cleaners and heavy water use, both of which swell wood and lift laminate. Use a wrung-out damp cloth instead.
What Do Professional Cleaners Do Differently?
A trained cleaning crew doesn’t skip steps under time pressure, which is usually where DIY cabinet cleaning goes wrong. Professionals control degreasing so it never oversaturates a surface, service hardware while they’re in there anyway, and make sure everything is completely dry before anything gets put back.
Pure Homes Cleaning builds interior cabinet attention into its routine, deep, and move-in/move-out cleaning services for households across Washington DC, Virginia, and Maryland, using eco-friendly products where clients prefer them. Online booking and occasional promotional discounts make scheduling straightforward, and a results gallery shows the kind of finish quality clients get.
DIY works well for routine upkeep. Booking a pro makes more sense when:
- Grease has built up over months or years near the stove
- You’re prepping a rental for move-in or move-out and need it done right the first time
- You simply don’t have a free afternoon to dedicate to one kitchen
The Best Way to Clean Cabinet Hardware
Hinges and handles collect grease and hand oils faster than the cabinet interior does, mostly because they’re touched dozens of times a day. Skip them during a cleaning session and they’ll undo the fresh feeling of everything else.
For handles and pulls, a cloth dampened with the same mild dish soap solution wipes away most buildup. For grooved or decorative hardware, dip an old toothbrush in the soap solution and work it into the grooves where a cloth can’t reach.
Hinges need more care since moisture and metal don’t mix well long-term. Wipe them dry immediately after cleaning, and if a hinge feels stiff or squeaky afterward, a drop of household lubricant on the pin restores smooth movement. Avoid soaking hinges or spraying cleaner directly onto them. Excess liquid can seep behind the hinge plate and cause rust over time, especially on older cabinet sets where the metal isn’t rust-resistant.
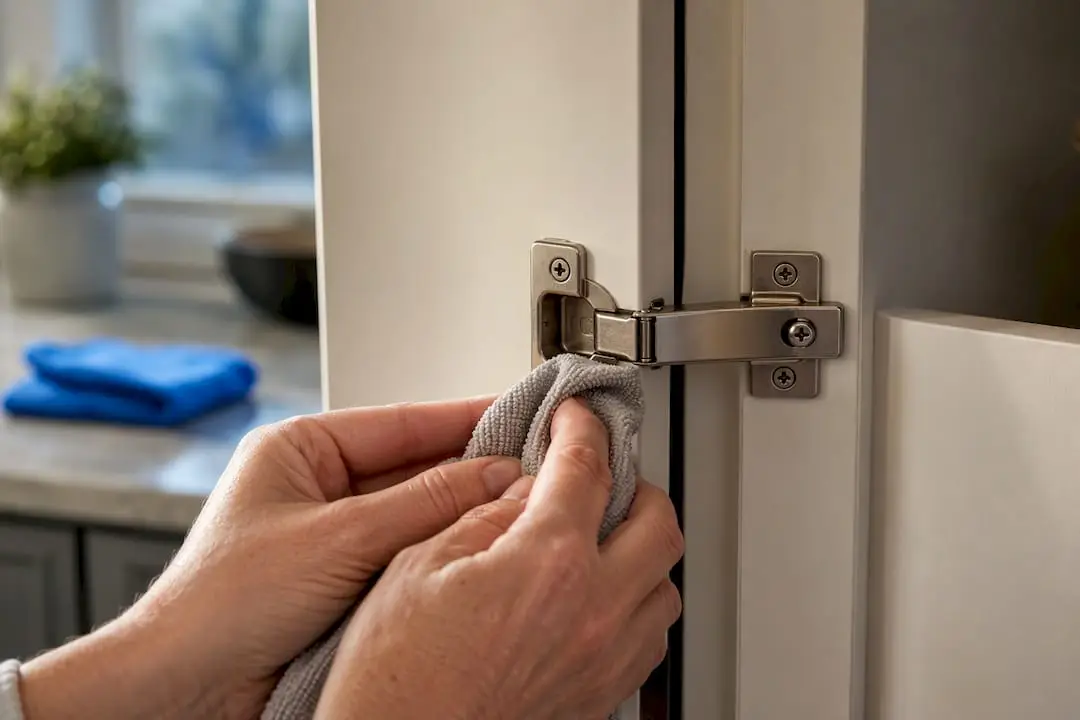
If handles are removable, unscrewing them occasionally for a quick soak in warm soapy water gets into the small crevices a wipe-down misses, particularly around screw holes where grime tends to collect unnoticed. Dry them fully before reattaching.
How Do You Get Rid of Mold Inside Cabinets?
Mold and mildew inside cabinets almost always trace back to trapped moisture, whether from a leaky sink pipe, a damp sponge left inside, or cabinets closed while still wet from cleaning. A musty smell or dark speckled spots on wood or shelf liner are the usual first signs.
For small, surface-level mold spots, a solution of one part water to one part white vinegar wiped on and left for a few minutes before scrubbing with a soft brush handles most cases. Dry the area completely afterward and leave the doors open for several hours. For mold that has spread across a wide area or that keeps returning, it is a sign of an ongoing moisture source, like a slow leak, and it needs to be fixed at the source before any cleaning solution will make a lasting difference.
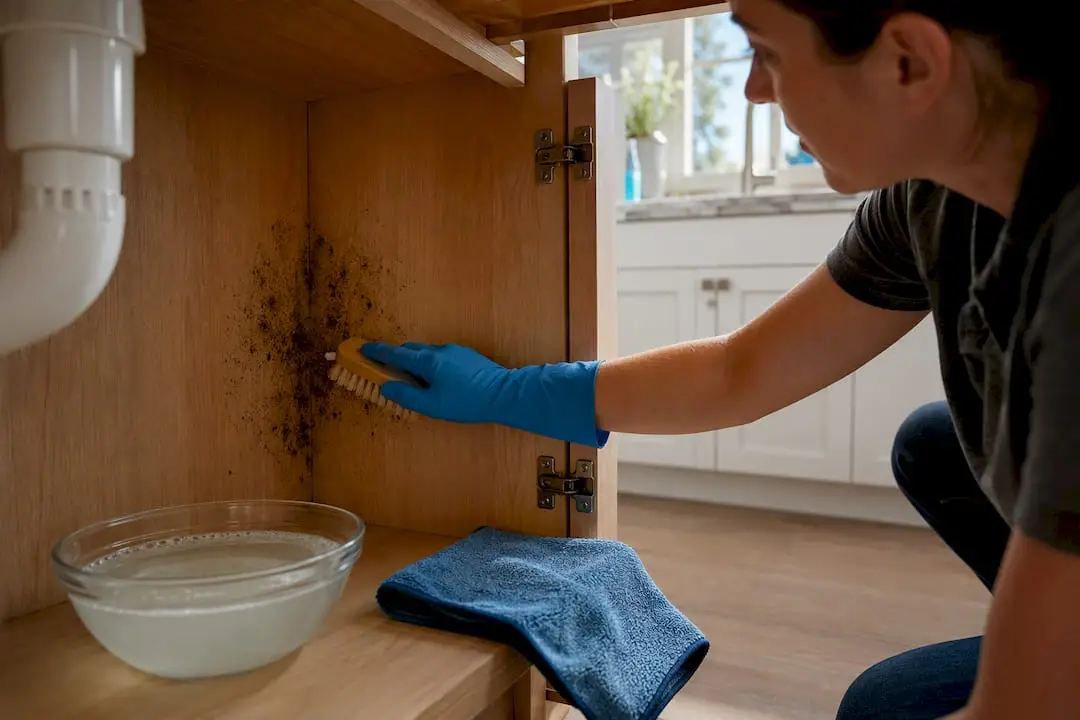
Never seal a cabinet back up while there’s any lingering dampness or odor; for wood cabinets, choose cleaning methods that keep wood intact to avoid damage. If mold keeps coming back despite drying and cleaning the area properly, it’s worth having a professional cleaning service or a plumber take a closer look, since hidden leaks behind cabinetry don’t always show obvious signs until the damage is significant.
What Actually Matters More Than the Products You Use
Most cabinet-cleaning advice fixates on the right spray or the right cloth. That’s not wrong, but it misses the bigger issue: the drying step is where most damage actually happens, not the washing step. People rinse fine and then shut the doors five minutes later because the kitchen looks done. That’s the moment moisture gets trapped against wood grain or behind a hinge plate, and it’s the slow, invisible cause of warping and rust that shows up months later.
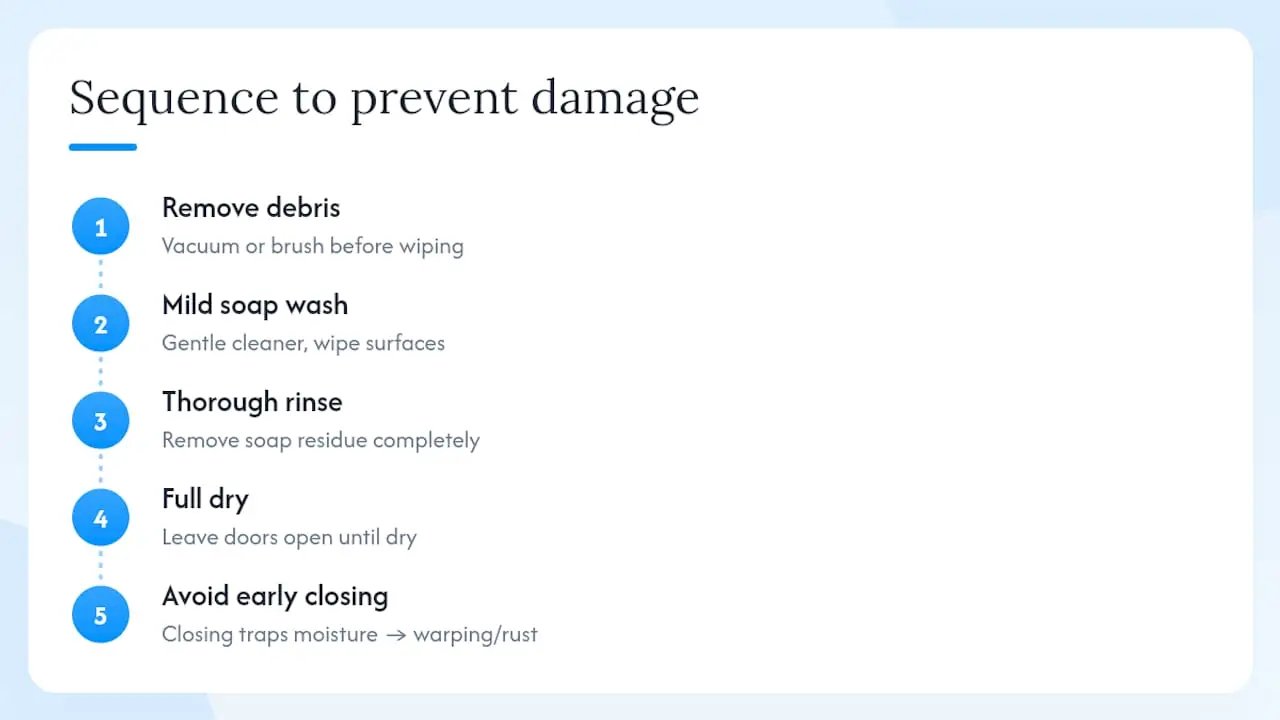
The conventional advice treats cabinet cleaning as an aesthetics problem: make it look nice, move on. Treating it as a hygiene problem, given that cabinets store the food you eat, changes the calculus. It means prioritizing the vacuum-first step before wiping, which most people skip, and it means treating the open-door drying period as mandatory rather than optional.
If you take one thing from this guide, prioritize the sequence over the products: debris out, mild soap in, thorough rinse, full dry before anything goes back. Get that order right and the cleaner you use matters far less than people assume.
— Local
Book Professional Cabinet Cleaning With Pure Homes Cleaning
Pure Homes Cleaning is the option for households in Washington DC, Virginia, and Maryland who’d rather skip an afternoon of scrubbing shelves and let a trained crew handle it as part of a full kitchen service.

Cabinet interiors get covered as part of routine, deep, and move-in/move-out cleaning services, so you’re not paying for a standalone add-on. If your cabinets have years of built-up grease rather than a light seasonal layer, a deep cleaning session tackles that properly instead of leaving it half-finished the way a rushed DIY session often does. Renters preparing to hand back keys can lean on the same service to get cabinet interiors move-out ready.
Booking takes a few minutes online, plans are customizable to your kitchen’s size and condition, and Pure Homes Cleaning runs occasional promotional discounts for new bookings. If a Saturday spent wiping shelves sounds like a worse use of your time than the cost of a cleaning, book a cleaning online and compare the two for yourself.
Sources
- How to Clean Kitchen Cabinets | Reviews by Wirecutter
- How to Clean Greasy Kitchen Cabinets, According to Cleaning Pros
- How Often Should You Be Cleaning Your Kitchen Cabinets? | The Kitchn
FAQ
What Should I Clean the Inside of My Cabinets With?
A cloth dampened with warm water and a few drops of mild dish soap handles most cabinet interiors, followed by a clean-water rinse and immediate drying.
What Should You Not Use to Clean Cabinets?
Avoid disinfecting wipes, undiluted bleach, abrasive scouring pads, and steam cleaners, since all four can strip, yellow, or warp cabinet finishes over time.
Can I Use Clorox Wipes Inside Cabinets?
It’s best to avoid them. Disinfecting wipes contain chemicals that can dull or discolor painted and laminate finishes with repeated use, so a mild soap solution is the safer choice.
How Do I Refresh the Inside of Kitchen Cabinets?
Empty the cabinet, vacuum out crumbs, wipe with a mild soap solution, rinse, and dry fully with the doors open before restocking. For heavy grease, a baking-soda paste or degreaser handles the tough spots first.
How Often Should I Deep Clean Cabinet Interiors?
Every three to six months for most cabinets, with cabinets near the stove needing attention closer to every one to two months due to grease buildup.